How to Create a Chatbot for a Website in Minutes (2026) | ZynfoAI
Sachin Jaiswal
In this article
Share Knowledge
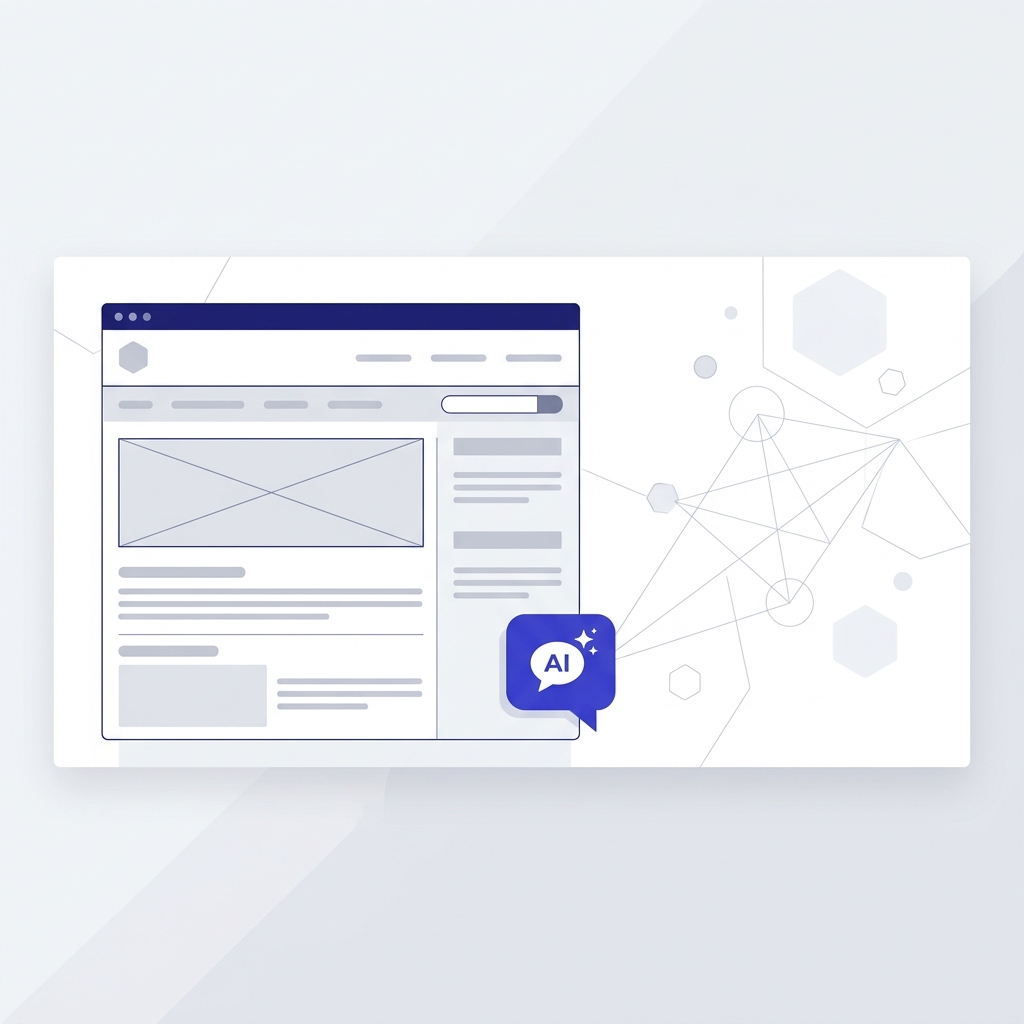
Every website visitor who leaves without getting an answer is a missed opportunity. Whether they had a product question, needed support, or were ready to buy, the moment they bounce, you lose potential revenue. That is exactly the problem an AI chatbot solves — and with ZynfoAI, you can create one and embed it on your website in minutes, not months.
This guide walks you through the entire process of how to create a chatbot for a website using the ZynfoAI platform to build a responsive chat website. You will learn how to set up your account, train the AI on your own content, customize the interface, and complete your website chat widget embed — from a simple HTML page to WordPress, Shopify, React apps, and beyond. No coding experience is required.
Table of Contents
- What Is ZynfoAI and How Does It Work?
- Prerequisites Before You Start
- Step 1 — Create Your ZynfoAI Account and Bot
- Step 2 — Build Your Knowledge Base
- Step 3 — Configure Your Bot Settings
- Step 4 — Customize the Chat Widget Appearance
- Step 5 — Embed the Chatbot on Your Website
- Step 6 — Test, Monitor, and Optimize
- Platform-Specific Installation Guides
- Advanced Configuration and API Control
- Why ZynfoAI Over Building from Scratch
- Frequently Asked Questions (FAQ)
- Conclusion
What Is ZynfoAI and How Does It Work?
ZynfoAI is an AI-powered chatbot platform that lets you create intelligent, knowledge-aware chatbots for any website. Unlike rule-based bots that follow rigid decision trees, ZynfoAI uses Retrieval-Augmented Generation (RAG) technology to deliver accurate, context-aware answers grounded in your actual business content.
Here is how the architecture works at a high level:
- You provide content — website URLs, documents, PDFs, or manual entries go into your knowledge base
- ZynfoAI processes and indexes it — content is chunked, embedded as vectors, and stored for semantic search
- Visitors ask questions — the AI retrieves the most relevant content chunks using vector similarity
- The LLM generates answers — a large language model crafts a natural response grounded in your retrieved content
- Sources are cited — visitors can see exactly where each answer came from
This RAG approach means your chatbot never invents information. Every response is traceable back to content you control, which makes it far more reliable than generic AI chatbots that rely solely on pre-trained knowledge. Learn more about this technology in our AI knowledge base software deep dive.
Prerequisites Before You Start
Before creating your chatbot, gather the following:
- A ZynfoAI account — sign up at zynfo.ai/pricing (free tier available)
- Content for your knowledge base — at minimum, your website URL; ideally, FAQ documents, product guides, help center articles, and policy pages
- Access to your website’s HTML — you will need to paste a single
<script>tag into your site’s template - 5–15 minutes — that is the total time from signup to a live chatbot
No technical skills, API keys, or server setup are required for the standard embed method.
Step 1 — Create Your ZynfoAI Account and Bot
Sign Up and Access the Dashboard
- Go to zynfo.ai and create a free account
- Verify your email and log in to the dashboard
- You land on the Bot Management page — this is your central control panel
Create a New Bot
- Click “Create New Bot”
- Give your bot a descriptive name (e.g., “Website Support Assistant” or “Sales Helper”)
- A unique Bot ID is generated automatically — this UUID identifies your chatbot and is used in the embed code
Your bot is now created but empty. The next step is to give it knowledge.
Step 2 — Build Your Knowledge Base
The quality of your chatbot depends entirely on the quality of your knowledge base. ZynfoAI’s AI knowledge base system supports multiple content sources.
Ingest Website URLs
The fastest way to populate your knowledge base is by ingesting your existing website:
- Navigate to the Knowledge Base section in your dashboard
- Click “Add Source” and select URL
- Enter your website URL (e.g.,
https://yoursite.com/about) - Click “Ingest”
ZynfoAI automatically:
- Fetches the page content
- Strips navigation, ads, and boilerplate HTML
- Splits the clean content into semantically meaningful chunks
- Generates vector embeddings for each chunk
- Stores everything for instant retrieval
Pro tip: Ingest your most important pages first — pricing, FAQ, product/service pages, and your “About” page. These cover the majority of visitor questions.
Upload Documents
For content that is not on your website, upload files directly:
- PDF documents — product manuals, whitepapers, policy documents
- Help center content — troubleshooting guides, how-to articles
- Internal documentation — any reference material your chatbot should know
Recommended Content to Include
| Feature | Zynfo AI | Priority |
|---|---|---|
| FAQ Pages | Covers most common visitor questions | High |
| Pricing and Plans | Reduces friction for purchase decisions | High |
| Product/Service Descriptions | Enables accurate recommendations | High |
| Shipping and Return Policies | Answers transactional concerns | Medium |
| About and Team Pages | Builds trust in AI responses | Medium |
| Blog Posts and Guides | Adds depth for detailed queries | Low |
Knowledge Base Best Practices
- Keep content current — outdated information leads to wrong answers
- Use clear, conversational language — the AI responds better with well-written source material
- Cover edge cases — add content for questions you know customers ask frequently
- Review and prune — remove irrelevant or duplicate content that might confuse retrieval
For organizations managing large content libraries, our knowledge management system provides advanced tools for content organization and maintenance.
Step 3 — Configure Your Bot Settings
With your knowledge base populated, configure how your bot behaves.
Content Settings
In the Content tab of the bot management interface:
- Heading — the title displayed at the top of the chat window (e.g., “Hi! Ask me anything”)
- Description — a subtitle explaining what the bot can help with
- Chat Input Placeholder — the hint text inside the message input (e.g., “Type your question…”)
- Welcome Messages — one or more greeting messages shown when the chat opens. You can add multiple messages for a conversational feel
Advanced Settings
In the Advanced tab:
- Enable History — saves chat history in the visitor’s browser using localStorage, so returning visitors see their previous conversations
- Show Sources — when enabled, the bot displays links to the source content used to generate each answer, building visitor trust
- Max Messages — limits the number of messages stored per session
- Auto Open — automatically opens the chat window after the page loads (use sparingly to avoid being intrusive)
- Typing Delay — adds a realistic typing animation before responses appear
Offline Message Configuration
In the Offline Message tab, configure what visitors see when your bot encounters issues:
- Offline Enabled — toggle offline mode
- Offline Message — a custom message shown when the service is temporarily unavailable
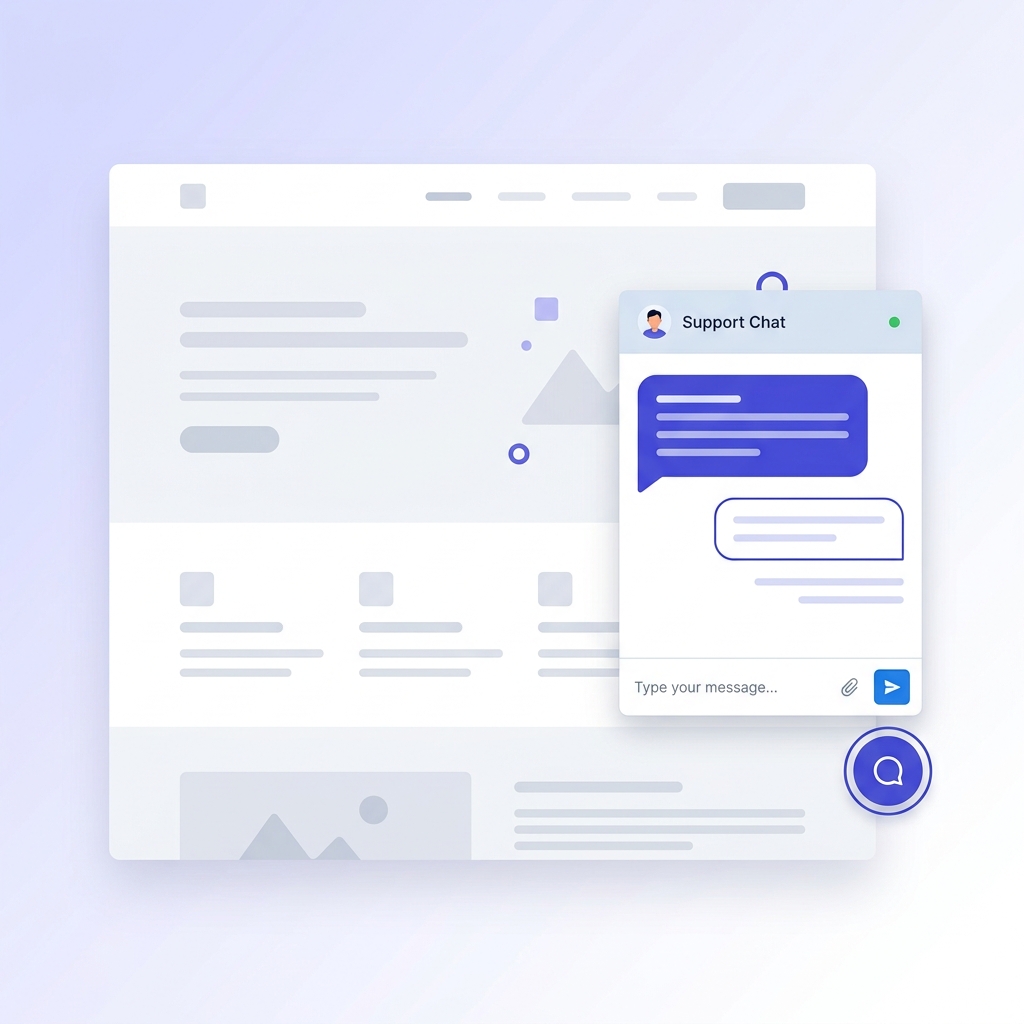
Step 4 — Customize the Chat Widget Appearance
A chatbot that matches your brand builds trust. ZynfoAI provides extensive chat widget customization through the bot management interface.
Appearance Settings
In the Appearance tab:
| Feature | Zynfo AI | Recommendation |
|---|---|---|
| Theme | Light or Dark | Match your site's color scheme |
| Primary Color | Any hex color | Use your brand's primary color |
| Position | Bottom-right, bottom-left, top-right, top-left | Bottom-right (industry standard) |
| Border Radius | 0–30px | 12–16px for modern feel |
| Font Size | 12–18px | 14px (default, readable) |
| Width | 300–500px | 380px (balanced) |
| Height | 400–700px | 500px (enough for conversation) |
Custom CSS
For pixel-perfect control, use the Custom CSS tab to override any widget style:
/* Example: Custom font and shadow */
.chat-widget-container {
  font-family: 'Inter', sans-serif;
  box-shadow: 0 8px 32px rgba(0, 0, 0, 0.12);
}

/* Example: Custom message bubble colors */
.message-bot {
  background: #f0f4ff;
  border-radius: 16px 16px 16px 4px;
}
Live Preview
Every change you make is reflected in a real-time preview panel on the right side of the bot management interface. This two-column layout lets you configure settings on the left and instantly see the result on the right — no guesswork, no deploy-and-check cycles.
Ready to scale your business with AI?
Join 2,000+ forward-thinking teams using ZynfoAI to automate support, capture leads, and grow revenue 24/7.
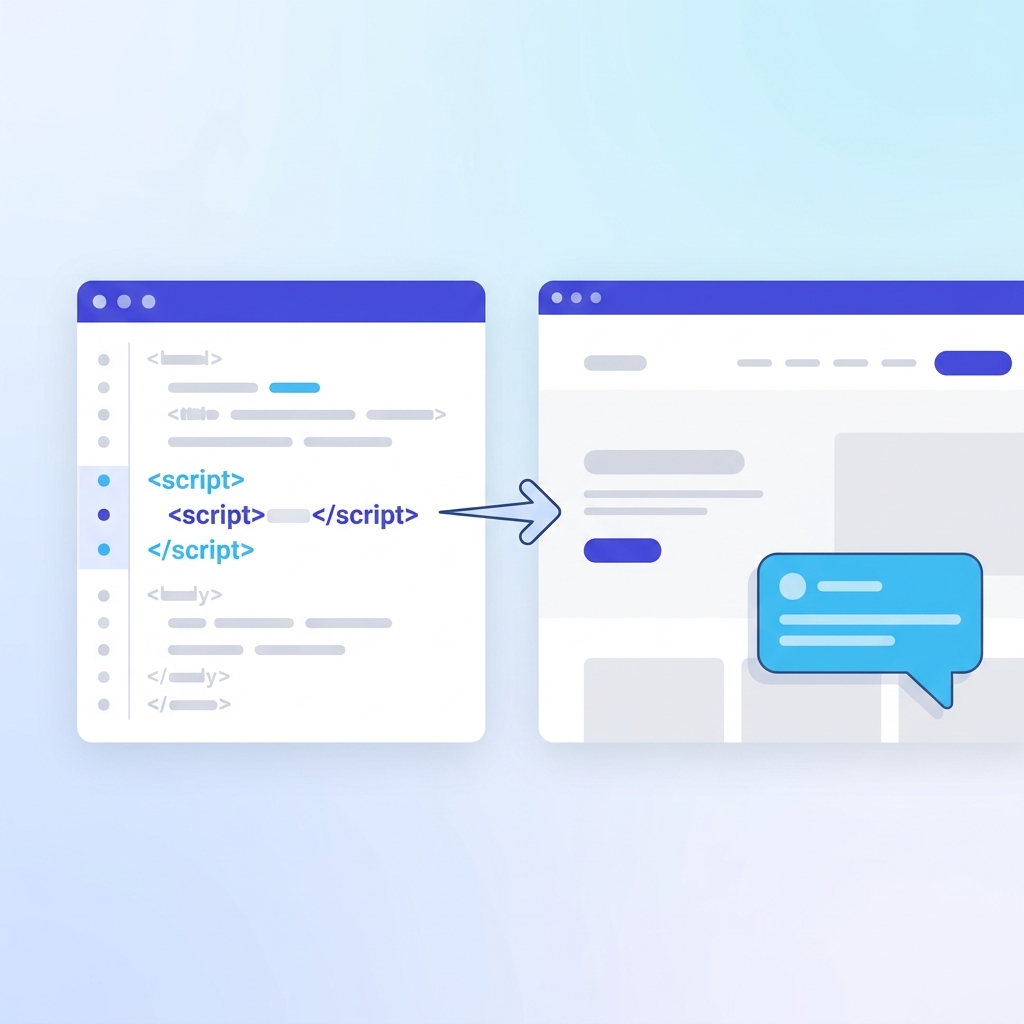
Step 5 — Embed the Chatbot on Your Website
This is the core step. Once your bot is configured, adding it to your website requires a single line of code.
The Embed Code
Copy the embed script from your bot’s settings page. It looks like this:
<script
  id="__zynfoai-chat-widget__"
  src="https://app.zynfo.ai/widget/embed.js"
  data-chatbot-id="YOUR_BOT_ID"
  async>
</script>
Replace YOUR_BOT_ID with the UUID shown in your bot management dashboard.
Where to Place the Code
Paste this script before the closing </body> tag in your website’s HTML template. This ensures:
- The page content loads first (no render-blocking)
- The
asyncattribute lets the browser load the widget in the background - The widget appears in the configured position (default: bottom-right corner)
How the Embed Script Works
When the script loads, it:
- Reads the
data-chatbot-idattribute from the script tag - Fetches your bot configuration from the ZynfoAI API
- Loads React (only if not already present on the page)
- Loads the widget bundle (
widget.js) and styles (widget.css) - Initializes the chat widget with your configuration
- Renders the floating chat bubble in the configured position
The entire process happens asynchronously and typically completes in under 2 seconds on a standard connection.
Alternative: URL Parameter Method
If you cannot set data attributes, pass the bot ID as a URL parameter:
<script
  src="https://app.zynfo.ai/widget/embed.js?bot_id=YOUR_BOT_ID"
  async>
</script>
Both methods are equivalent — use whichever fits your platform best.
Step 6 — Test, Monitor, and Optimize
Testing Checklist
Before going live, verify these items:
- Widget loads — chat bubble appears in the correct position
- Knowledge base responds — ask a question your content covers and verify accuracy
- Sources display — if enabled, source links should appear below answers
- Mobile responsiveness — test on phone and tablet screen sizes
- Theme consistency — colors and fonts match your site
- Edge cases — ask a question your content does NOT cover and verify the fallback response
Monitor Conversations
Use the ZynfoAI dashboard to:
- Review conversation transcripts — see exactly what visitors ask and how the AI responds
- Identify knowledge gaps — questions the bot cannot answer indicate missing content
- Track engagement metrics — conversation volume, completion rates, and satisfaction
- Improve over time — add new content to your knowledge base based on real questions
Optimization Tips
- Add content for unanswered questions — review conversation logs weekly and ingest new content to fill gaps
- Refine welcome messages — test different greetings to see which ones drive more engagement
- Adjust typing delay — too fast feels robotic, too slow feels sluggish (300–500ms is the sweet spot)
- Enable sources for trust — showing source links increases visitor confidence in answers
Platform-Specific Installation Guides
The embed code works universally, but here are step-by-step instructions for the most popular platforms.
HTML / Static Sites
Paste the embed script directly before </body> in your HTML file:
<!DOCTYPE html>
<html lang="en">
<head>
  <title>Your Website</title>
</head>
<body>
  <!-- Your page content -->

  <!-- ZynfoAI Chatbot -->
  <script
    id="__zynfoai-chat-widget__"
    src="https://app.zynfo.ai/widget/embed.js"
    data-chatbot-id="YOUR_BOT_ID"
    async>
  </script>
</body>
</html>
WordPress
You have three options for WordPress integration:
Option A — Plugin (Recommended)
- Navigate to Plugins → Add New in your WordPress admin
- Search for “ZynfoAI”
- Install and activate the plugin
- Enter your Bot ID in the plugin settings
- Save — the chatbot appears on all pages automatically
Option B — Header/Footer Plugin
- Install the “Insert Headers and Footers” plugin
- Go to Settings → Insert Headers and Footers
- Paste the embed script in the “Footer Scripts” section
- Save changes
Option C — Theme File
- Go to Appearance → Theme Editor
- Open
footer.php - Paste the embed script before
<?php wp_footer(); ?> - Save (use a child theme to prevent update overwrites)
For a complete walkthrough, read our WordPress AI chatbot guide.
Shopify
For Shopify stores:
- Go to Online Store → Themes in your Shopify admin
- Click Actions → Edit Code on your active theme
- Open
layout/theme.liquid - Paste the embed script before the closing
</body>tag:
<!-- ZynfoAI Chatbot -->
<script
  id="__zynfoai-chat-widget__"
  src="https://app.zynfo.ai/widget/embed.js"
  data-chatbot-id="YOUR_BOT_ID"
  async>
</script>
</body>
- Save the file — the chatbot now appears on every page of your store
Shopify store owners can also pass customer and product context for personalized responses. See our full Shopify AI chatbot integration guide for advanced configurations including cart recovery and inventory-aware responses.
React / Next.js / Single Page Applications
For React-based apps, use the useEffect hook to dynamically load the widget:
import { useEffect } from 'react';

function App() {
  useEffect(() => {
    const script = document.createElement('script');
    script.id = '__zynfoai-chat-widget__';
    script.src = 'https://app.zynfo.ai/widget/embed.js';
    script.setAttribute('data-chatbot-id', 'YOUR_BOT_ID');
    script.async = true;
    document.body.appendChild(script);

    return () => {
      document.body.removeChild(script);
      const widget = document.getElementById('chatbot-widget');
      if (widget) widget.remove();
    };
  }, []);

  return <div>Your app content</div>;
}
This approach works identically for Next.js, Gatsby, Remix, and any other React-based framework.
Wix, Squarespace, and Other Hosted Platforms
Wix: Use the Embed Code element in the Wix Editor to add the script to your site footer.
Squarespace: Navigate to Settings → Advanced → Code Injection and paste the script in the Footer section (requires Business or Commerce plan).
Webflow: Add the script in Project Settings → Custom Code → Footer Code.
For detailed instructions on adding chat to any website platform, see our complete technical implementation guide.
Advanced Configuration and API Control
For developers who want programmatic control, ZynfoAI exposes a JavaScript API through the window.ChatWidget object.
Programmatic Widget Control
After the widget loads, you can control it from your own JavaScript:
// Open the chat window
ChatWidget.open();

// Close the chat window
ChatWidget.close();

// Toggle open/closed
ChatWidget.toggle();

// Clear conversation history
ChatWidget.clearHistory();

// Update configuration dynamically
ChatWidget.updateConfig({
  primaryColor: '#10B981',
  theme: 'dark'
});

// Reload configuration from the server
await ChatWidget.reloadConfig();
Use Cases for the API
- Trigger chat on button click — connect a “Chat with us” button to
ChatWidget.open() - Page-specific behavior — change widget theme or greeting based on the current page
- Event-driven engagement — open the chat when a user hovers over the exit button or spends a certain amount of time on a page
- A/B testing — dynamically update configuration for different visitor segments
Integration with Business Tools
ZynfoAI connects with your existing stack to create a seamless workflow. Explore our API and AI integration guide for connecting your chatbot with:
- CRM platforms — sync captured leads directly to your sales pipeline
- Help desks — escalate complex conversations to human support agents
- Slack — receive real-time notifications via our Slack integration
- WhatsApp — extend your chatbot to WhatsApp Business for omnichannel support
- Notion and Confluence — pull knowledge from Notion or Confluence workspaces
Why ZynfoAI Over Building from Scratch
It is tempting to build a custom chatbot, especially if you have development resources. But the total cost of ownership tells a different story.
| Feature | Zynfo AI | Custom Development |
|---|---|---|
| Time to Launch | 15 minutes | 3–6 months |
| Development Cost | $0 (free tier) | $20,000–$100,000+ |
| AI Model Management | Platform-managed | You manage prompts, models, and infra |
| Knowledge Base | Built-in RAG pipeline | Build vector DB, chunking, embeddings |
| Widget & Embed | One-line script tag | Build custom frontend |
| Maintenance | Automatic updates | Ongoing engineering work |
| Scalability | Auto-scales to any traffic | Provision your own infra |
The Hidden Costs of Custom Chatbots
Building from scratch requires assembling multiple components:
- Vector database — PostgreSQL with pgvector, Pinecone, or Weaviate
- Embedding pipeline — OpenAI or Hugging Face for generating vector embeddings
- LLM integration — API calls to GPT-4, Claude, or open-source models
- Chunking logic — smart text splitting that preserves semantic meaning
- Frontend widget — a responsive, accessible chat UI
- Streaming — Server-Sent Events for real-time response streaming
- Session management — conversation history, context windows, and memory
- Security — rate limiting, input validation, CORS, and authentication
- Monitoring — conversation analytics, error tracking, and quality assurance
ZynfoAI handles all of this out of the box. You focus on your content and your customers. For agencies managing multiple clients, the platform supports multi-tenant bot management with separate knowledge bases per client.
Frequently Asked Questions (FAQ)
How long does it take to create a chatbot with ZynfoAI?
Most users go from signup to a live chatbot in under 15 minutes. The process involves creating a bot (1 minute), ingesting content (2–5 minutes depending on volume), configuring appearance (2 minutes), and pasting the embed code (1 minute). The AI starts answering questions immediately after content ingestion completes.
Do I need coding skills to use ZynfoAI?
No. The entire setup — from account creation to embedding the widget — requires zero coding knowledge. You copy a single <script> tag and paste it into your website. The bot management interface is a visual dashboard with point-and-click configuration and a live preview panel.
What types of content can I add to the knowledge base?
ZynfoAI accepts website URLs (automatic scraping and indexing), PDF documents, and manual text entries. The system automatically cleans HTML, splits content into semantic chunks, generates vector embeddings, and stores everything for retrieval. You can add, update, or remove content at any time.
Will the chatbot slow down my website?
No. The embed script loads asynchronously with the async attribute, meaning it never blocks your page from rendering. The widget bundle is lightweight and loads after your page content is fully visible. Typical widget load time is under 2 seconds.
Can I use ZynfoAI on multiple websites?
Yes. You can create multiple bots within your ZynfoAI account, each with its own knowledge base, appearance settings, and embed code. This is particularly useful for agencies managing chatbots for multiple clients.
How does ZynfoAI handle questions it cannot answer?
When the AI cannot find relevant information in your knowledge base, it responds transparently rather than inventing answers. You can configure fallback behavior including suggesting the visitor contact your team, displaying your contact page, or triggering a live chat handoff to a human agent.
Is there a free plan?
Yes. ZynfoAI offers a free tier that includes basic chatbot functionality so you can test the platform before committing. Paid plans unlock advanced features like unlimited conversations, custom branding removal, priority support, and enhanced analytics. See our pricing page for details.
Does the chatbot work on mobile devices?
Yes. The widget is fully responsive. On desktop, it displays as a configurable-size window (default 380×500px). On mobile, it automatically adapts to full-width with responsive height. Touch targets meet accessibility standards (minimum 44px tap targets), and the widget handles mobile keyboard interactions properly.
Can I customize the chatbot’s appearance to match my brand?
Absolutely. You can configure theme (light/dark), primary color, position, border radius, font size, width, height, and add custom CSS for complete control. The bot management interface includes a live preview so you see every change in real time before deploying.
What makes ZynfoAI different from other chatbot platforms?
ZynfoAI uses RAG (Retrieval-Augmented Generation) technology, which means every answer is grounded in your actual content rather than generic AI knowledge. This eliminates hallucinations, ensures accuracy, and lets you trace every response back to its source. Combined with a one-line embed, visual configuration, and no-code setup, it offers the fastest path from zero to a production-ready AI chatbot. Compare us against Tidio, Tawk.to, and SiteGPT to see the differences.
Can the chatbot capture leads?
Yes. ZynfoAI supports lead capture through conversational forms. The AI can naturally collect visitor name, email, and inquiry details during the conversation and sync them to your CRM or email platform. Visit our lead generation page for more on how AI-powered lead capture outperforms traditional forms.
Does ZynfoAI support multiple languages?
Yes. The AI supports 50+ languages with automatic detection. Visitors can type in their preferred language, and the chatbot responds in the same language using your knowledge base content. This makes it ideal for businesses serving international audiences.
Conclusion
Creating a chatbot for your website no longer requires months of development, a team of engineers, or a six-figure budget. With ZynfoAI, the process is straightforward:
- Sign up and create a bot
- Ingest your content by pasting URLs or uploading documents
- Customize the widget appearance through a visual dashboard
- Embed a single script tag on your website
- Go live — your AI chatbot starts answering visitor questions instantly
The key advantage of ZynfoAI is the RAG architecture. Your chatbot does not guess — it retrieves answers from your actual content and generates responses grounded in facts you control. This means accurate answers, traceable sources, and zero hallucinations.
Whether you run an e-commerce store, a SaaS product, a customer support operation, or a marketing website, an AI chatbot transforms your site from a passive brochure into an active, intelligent assistant that works around the clock.
Stop losing visitors to unanswered questions. Create your chatbot today.
Ready to Build Your Website Chatbot?
Create an AI-powered chatbot trained on your content and embed it on any website in minutes. Free tier available, no credit card required. Explore our [pricing plans](/pricing) or calculate your ROI with our [chatbot ROI calculator](/tools/chatbot-roi-calculator).
No credit card required · Free plan available · Setup in minutes
Related Keywords & Expertise
You Might Also Like
Website Chat Widget: How to Add, Design & Optimize (2026) | ZynfoAI
Complete guide to website chat widgets. Learn how to add, customize, and optimize a chat widget using ZynfoAI for higher engagement and conversions.
How to Add Chat on Website: Technical Guide (2026) | ZynfoAI
Learn exactly how to add chat on website pages with JavaScript embed, CMS plugins, and API integration. Step-by-step instructions for any site.
How AI Agents Are Transforming E-commerce
Discover how autonomous ecommerce agents and agentic AI are revolutionising online retail. Learn high-impact use cases for AI agents in e-commerce, and how an ai agent e-commerce strategy drives growth.
Automate Support & Capture Leads
with
AI Agents
Start using AI agents to answer customer questions, capture leads, and support your business 24/7 — without adding more work to your team.
Free trial · Setup in 5 minutes · Cancel anytime
Questions? Talk to us.